Sugar Crusted Popovers

If you’re like me you’re always looking for something a little different when it comes to cooking.  I will be the first to admit I’m not a huge bread fan, but when I do make bread, biscuits, or rolls, I like to go outside of the box and look for unique.  I started playing with popovers  changing the texture and taste and of course experimenting on my family 🙂

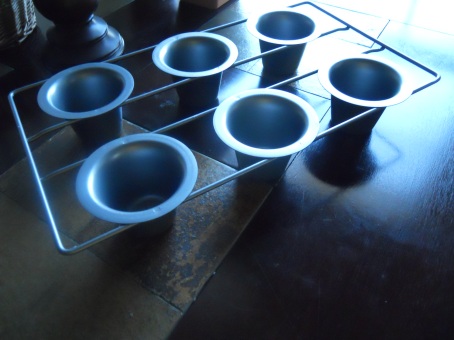
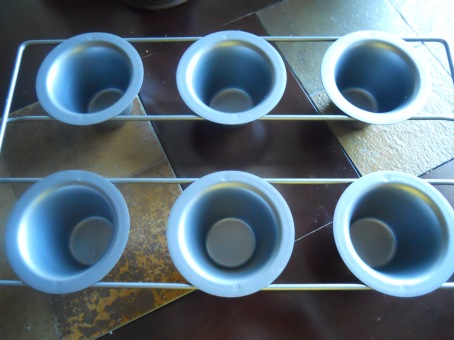
Popovers are basically dinner roles that “POP OVER” the baking pan. The batter will be very thin, almost liquid like, but I promise you this recipe will work out perfectly.  After several batches, I decided it needed a touch of sugar in the batter for my taste.  Keep in mind, this recipe is PERFECT as a sweet OR savory bread.  There are two important tips to creating perfect popovers:  First,  use a POPOVER pan to create this delicious treat. The pan is high on the sides, deep, and allows air to flow properly so the bread will rise. You can use a muffin tin, but you may not experience the same height.

DSCN1607

 Second PRE-HEAT the popover tin, BEFORE you fill the tins with the batter. This will ensure a beautifully tall popover!

DSCN1608

DSCN1574

Ingredients:

  • 4 large eggs, warmed in a cup of hot water for 10 minutes before cracking
  • 1 ½ C. milk (skim, low-fat, or full-fat), lukewarm
  • 1 ½ tsp sugar
  • ½ tsp salt
  • 1 ½ C. all purpose flour
  • Tbsp. melted butter
  • 1 C. sugar
  • 1 tsp. ground cinnamon

Directions:

  1. Preheat the oven to 450°F. Position a rack on a lower shelf. The top of the fully risen popovers should be about midway up the oven.
  2.  Grease the pan thoroughly, covering the area between the cups as well as the cups themselves. Make sure the oven is up to temperature before you begin to make the popover batter.
  3. Place the tin in the oven to get it warm.
  4.  Use an immersion blender OR use a blender to beat together the eggs, milk, sugar and salt until well combined, with no streaks of yolk showing.
  5.  Add the flour all at once, and beat until frothy; there shouldn’t be any large lumps in the batter, but smaller lumps are OK.
  6.  Stir in the melted butter, combining quickly.

  7. Pour the batter into the muffin cups, filling them to  3/4 full.

  8.  Make absolutely certain your oven is at 450°F. Place the pan on a lower shelf of the oven .

  9. Bake the popovers for 20 minutes without opening the oven door. Reduce the heat to 350°F (again without opening the door), and bake for an additional 10 to 15 minutes, until they’re a deep, golden brown. If the popovers seem to be browning too quickly, position an oven rack at the very top of the oven, and put a cookie sheet on it, to shield the popovers’ tops from direct heat.

  10. If you plan on serving the popovers immediately, remove them from the oven, and stick the tip of a knife into the top of each, to release steam and help prevent soggy rolls.

  11.  If you want the popovers to hold their shape longer without deflating and settling quite as much, bake them for an additional 5 minutes (for a total of 40 minutes) IF you can do so without them becoming too dark. This will make them a bit sturdier, and able to hold their “popped” shape a bit longer.

  12. Mix the extra 1 cup of sugar and 1 tsp cinnamon in a mixing bowl.
  13. Toss each popover in the cinnamon and sugar mixture to coat and serve.
Traditional Kimchi

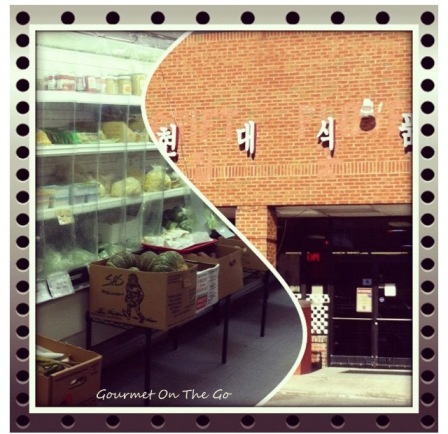
As an Army brat, I grew up with an extremely diverse group of friends and a lot of exposure to international cuisine.  My love of Korean food stems from my cousin and her husband who is biracial and part Korean. So one day they decided to take us out to dinner to a Korean grocery store that was also a restaurant (insert side glare). Needless to say, I was SCARED! That was the day I fell in LOVE! From bim bim bap(vegetables over rice with a sunny side up eggs)  to bulgogi (marinaded beef or pork), I love it all. I usually gather my goodies from our local Asian market. I’m there so much, I should know how to speak the language, but alas I’m stuck with pointing and googling titles 🙂

photo

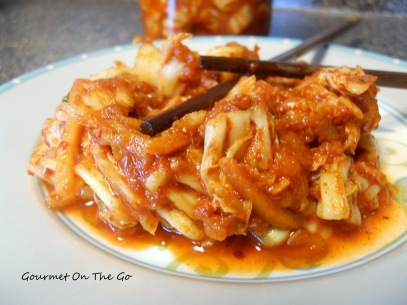
My natural progression was to try my hand at making Kimchi and it was much easier than I thought! Kimchi is fermented vegetables with a variety of seasons. I will say there are many recipes for kimchi, but I prefer to make mine with more of a sauce versus a slurry. The slurry mixture makes the mixture a bit more thick, I prefer the sauce because I like to use my kimchi several different ways. It can be used as a side dish, stirred into fried rice, or added to make a kimchi pancake(kimchijeon)! I know trying new foods is a bit scary, but step out of the box with me and give it a try.

Let’s get started!

DSCN1606

Ingredients:

Sauce:

  • 8-10 garlic cloves, grated
  • 1 heaping tablespoon fresh ginger, grated
  • 1 grated daikon radish*
  • 1 C carrots, julienned
  • 1 C water
  • ¼ C salted shrimp*
  • 2 tablespoons fish sauce
  • 1 to 1 1/2 cups Korean Red Pepper Powder
  • 1 bunch green onions, sliced
  • 1 grated asian pear*
  • ¼ C. salt
  • 1 teaspoon toasted sesame oil
  • 3-4 canning jars

*These items can be found in your local Asian market; however, I have found the asian pear and daikon radish in local markets.

Directions:

  1. Cut the napa cabbage and quarter it length wise keeping the base in tact.
  2. Make sure the leaves are still connected at the base, gently separate the leaves and sprinkle salt between each section placing more salt close to the base than the tip of the leaf.
  3. Place the quartered napa cabbage in a container that’s deep enough to cover the cabbage with water.
  4. Place a heavy object on top of the cabbage and let the cabbage sit for at least 1 hour but preferably overnight.
  5. Next combine all of the sauce ingredients in very large bowl.
  6. Once the cabbage is brined, rinse, drain, and chop the cabbage.
  7. Toss the cabbage with the sauce mixture until coated.
  8. Place the mixture into the  fermenting vessels and cover with lid.
  9. Make sure not to over pack the jars, leaving at least 1″ of space at the top. If you pack your jar too full you will have a very stinky kitchen.
  10. Let the jars sit on the counter top for at least a day and then place into the refrigerator.
  11. Use the kimchi within 2 weeks. After that you will want to discard it because it will get too strong for use.

Quinoa Tabbouleh

So I love finding eclectic foods and giving them a whirl! This recipe starts off with a couple of definitions because I know trying new foods can sometimes be a bit intimidating (yes as adventurous as I am there are some foods even I am afraid to try).

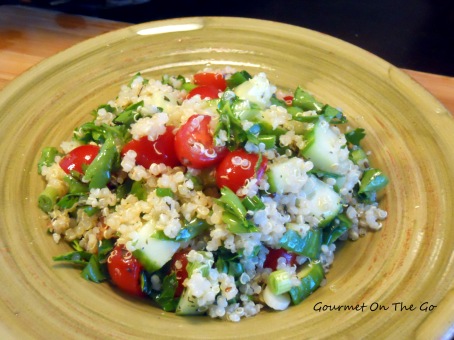
Let’s start with Quinoa! Yes,  it looks unusual and not many people have tried it, but it is a DEFINITE power house food! Quinoa is categorized as a grain, but it’s actually an edible seed.  It’s lower in carbs than most grains, loaded with protein, and the same caloric value as brown rice.   With all of these benefits, why not give it a try?

Then there’s tabbouleh! Tabbouleh is an arabic salad traditionally made of bulgur although sometimes bulgur has been substituted with couscous.

If you’re looking for something new to try that’s absolutely healthy give this recipe a try as a main vegetarian course or a healthy side dish!

DSCN1603


Ingredients:

  • 1 C. quinoa, rinsed
  • ½ tsp. kosher salt
  • 3 Tbsp. lemon juice
  • 2 garlic cloves, minced
  • ½ C. olive oil
  • 1 large English hothouse cucumber, cut into ¼ inch pieces
  • 12 cherry tomatoes, halved
  • ½ C. flat-leaf parsley, chopped
  • ½ C. fresh mint, chopped
  • 2 scallions, sliced thinly

Directions:

  1. Place the quinoa, ½ tsp kosher salt, and 2 cups of water to boil over medium high heat in a medium saucepan.
  2. Lower the heat, cover the saucepan and simmer for 10 minutes.
  3. Remove from heat and let stand, covered, for 5 minutes and fluff with a fork.
  4. After fluffing, spread the cooked quinoa on a large baking sheet to cool throughly.
  5. When cooled, placed quinoa in a large mixing bowl.
  6. While the quinoa is cooling, mix the lemon juice and minced garlic in a bowl.
  7. Slowly whisk in the olive oil and season the dressing with salt and pepper to taste.
  8. Add ¼ C. of the lemon dressing.
  9. Add the vegetables, herbs, and scallions to the quinoa. Toss.
  10. Season with kosher salt and pepper to taste.
  11. Drizzle with the remaining dressing.

Serves 6

Adapted from Bon Appetit


Mexican Rice Bowl

This is one of my FAVORITE recipes! Have I said that before? I’m sure I have but I REALLY mean it lol! The perfect combination of cilantro, lime juice, black beans and corn and you’re in heaven. This recipe is perfect as a meal topped with a fresh salsa and you are instantly transported to HEAVEN. Take a peek!

531951_382830805138891_353502694_n

Ingredients:

  • 1½ C long-grain white rice, uncooked*
  • 1 small onion, chopped
  • 1 package smoked mexican turkey or chicken sausage, cut diagonally
  • 1 Tbsp extra virgin olive oil
  • 14 oz chicken broth or stock
  • 1¼ C water
  • 1 can black beans, rinsed and drained
  • 1 C. whole kernel corn, frozen or fresh
  • 2 Tbsp fresh cilantro leaves, chopped
  • Kosher salt, to taste
  • Crack pepper, to taste

Directions:

  1. Preheat the oven to 375 degrees.
  2. In a large mixing bowl, combine long-grain rice, onion,sausage, and extra virgin olive oil ensuring the rice is completely coated.
  3. Place the chicken broth and water in a medium-sized pot and bring to a boil.
  4. Place the rice mixture into a casserole dish or Dutch oven.
  5. Pour the broth mixture into the casserole or Dutch oven and place a cover over the container.
  6. Bake for 30 minutes.
  7. After 30 minutes, stir in the black beans, corn, and cilantro.
  8. Cover and bake an additional 15-20 minutes or until all of the liquid is absorbed.
  9. Remove the casserole from the oven.
  10. Top the completed dish with fresh salsa to garnish.

*long-grain rice works BEST for this dish to avoid excessive gumminess.

Greek Pizza

Fridays are made for pizza and what’s better than pizza made at home! If you haven’t noticed many of my recipes are very versatile meaning you can add or change any of the ingredients. If you’re watching your diet, yep this pizza is for you especially since studies show the Mediterranean diet is one of the healthiest diets you can eat! Get creative and let each family member “create” their own pizza!

DSCN1550


Ingredients:

  • 1 package flat bread
  • 2 C. fresh baby spinach leaves
  • 8 oz cooked chicken breast, chopped
  • ½ C. cherry tomatoes, quartered
  • ¼ C. feta cheese, crumbled
  • 2 Tbsp walnuts or pine nuts, chopped
  • ½ tsp dried oregano, crushed OR 1 ½ tsp fresh oregano, chopped
  • ½ tsp dried rosemary, crushed, OR 1 ½ tsp fresh rosemary, chopped
  • ¹⁄³ C. Red Wine Vinaigrette*recipe follows

Red Wine Vinaigrette:

Directions:

  1. Preheat the oven to 400 degrees.
  2. Place the flat bread on a large baking sheet.
  3. Add the spinach, chicken, tomatoes, feta cheese, nuts, and spices.
  4. Drizzle the pizza with the Red Wine Vinaigrette.
  5. Bake the pizza 10-15 minutes until the pizza is warm and serve.


Liebster Blog Award

Cover of "Julie & Julia"

Cover of Julie & Julia

Cover of "Blogging For Dummies (For Dummi...

Cover via Amazon


What an honor! When I started my blog in December a scene from Julie and Julia came immediately to mind. You know the one were her mother was her ONLY reader for MONTHS lol! I had to stop watching the numbers and focus on sharing my passion for food and cooking. Last week the bloggisphere acknowledge I AM NOT ALONE hee hee hee!

Cafe Vita presented me with an award for new bloggers and the really great thing is WE GET TO PASS along the love to other new bloggers who are trying to share their passion. So to honor the Liebster  Award,which is given to new bloggers that only have about 200 followers and is German for dearest, loveliest or favorite.
I want to share my award with you, several new blogger and give you a chance to get to know me!

liebster-blog-award

There are some rules to accepting this award:
1. Each awarded blogger will post 11 random facts about themselves
2. 11 questions provided by the sender have to be answered
3. 11 new bloggers have to be chosen to which the award will be passed on
Go to their pages, tell them about the award and pass on the link to your post!
So it is kind of blogger chain mail. This is a nice way to hep promote new blogs and to  get to know the owners.

Facts about Me:

1. I was born in Denver, CO

2. I’m a certified Army Brat

3. I’ve loved cooking since I was 8 years old

4. I use to own a pet pig named Molly…yes she was GREAT! The smartest pet I’ve ever owned

5. I have a SERIOUS SERIOUS SERIOUS dislike and fear of SNAKES

6. I don’t like bread

7. I don’t like chocolate

8. My boyfriend calls me his little black Korean because of my LOVE of Korean food 🙂

9. Go GREENBAY PACKERS!

10. I like to dance

11. I’m ALWAYS thinking about cooking, food, or recipes! I was born to do this 🙂

Now, Here are the  11 Questions I had to answer:

1.  Where do you live NOW? —COLUMBIA, SC
2.  What made you decide to blog?— MY DESIRE TO SHARE MY LOVE OF FOOD
3.  What was the number one tool that helped you get started?—BLOGGING FOR DUMMIES! A GREAT DETAILED BOOK FOR NEWBIES
4.  Share a blog address that INSPIRED you.—WWW.SMITTENKITCHEN.COM
5.   What are your goals for your blog?—I HOPE TO WRITE A RECIPE BOOK IN THE FUTURE
6.  How do you take your photos?—I LOVE MY NIKON! SIMPLE AND EASY TO USE, BUT I NEED TO GET BETTER LIGHTING
7.  How much time do you spend per day/week on your blog or Facebook interactions?—HUMMMM AT LEAST 10-15 HOURS WEEK
8.  What do you like most in a blog post from others?—I REALLY LIKE THE PICTURES & THE STORIES BEHIND THE MEALS
9.  What are other hobbies that you have besides blogging?—EXERCISING AND GARDENING…I’M ADDICTED 🙂
10. Favorite blog?—WWW.BIASRICHANDSWEETKITCHEN.COM
11. Favorite ingredient?—EUROPEAN BUTTER! IT’S GREAT IN SWEET OR SAVORY DISHES AND ALWAYS ADDS GREAT FLAVOR

11 Questions for new nominees to answer:

1. Why did you start your blog?

2. How long have you been blogging?

3. What’s your favorite meal or dish to cook?

4. What are your hobbies?

5. What’s your LEAST favorite food?

6. What are you currently obsessed with?

7. Are you a cat or dog owner?

8. Winter or summer?

9. If you could change your name, what would it be?

10. If you could change your occupation, what would it be?

11.  Football or Basketball?

Blogger friends worthy of the Liebster Award:

The Hunting Chef

On Sugar Mountain

Can I Have The Menu Please?

Food Observations

Penny and Rusty’s Food Blog

Daisy and the Fox

Fresh Food In A Flash

Foodi8today

Food and Beyond

FlavorNspice

Good Morning Sunshine Eggs

I’ve gotten into the habit of addressing my loved ones with “Good Morning Sunshine” and following it with a wonderful breakfast to start the day…usually eggs. If you never really thought about Eggs you should. A good egg, organic, free range, natural it’s worth the money.

Is she REALLY blogging about how to a basic egg? YES! I cooked some eggs for my boyfriend a couple of weeks ago and you’d think he died and gone to heaven. Literally, he’s been talking about these eggs for WEEKS! “You need to blog about your eggs…I’m serious!” If you can, splurge a bit and purchase the european butter. There is distinct difference in flavor and the eggs are a great place to showcase this fantastic butter.

The best description I can think of is rich, creamy, fluffy, and decadent also know as GOOD MORNING SUNSHINE EGGS 🙂

DSCN1565

Ingredients:

  • 2 large organic or natural eggs, room temperature
  • 1 Tbsp unsalted butter
  • 2 Tbsp heavy whipping cream
  • 1 tsp kosher salt
  • fresh cracked pepper, to taste
  • 1 tsp fresh chives, optional
  • cheese, salsa, sour cream, also optional condiments

Directions:

  1. Heat a stainless steel pan on medium high heat.
  2. While the pan is heating, crack the eggs in a large bowl and whisk.
  3. Melt the butter in the heated pan and add the whisked eggs BEFORE the butter stops frothing.
  4. Let the eggs set for 30 seconds and start to whisk them as they cook.
  5. Add the heavy whipping cream while the eggs are still UNSET and creamy.
  6. Add the kosher salt and continue to scramble until desired texture is achieved.
  7. Place cooked eggs on a serving dish.
  8. Top with your favorite condiment.

Meyer Lemon Pound Cake

Everyone thinks their food is good, but nothing boost your ego like a 16 year old boy. I began making this cake over 7 years ago. The first cake, awesome and gone in less than a week. The second cake, same thing! Before I know it, I was baking a cake a week for just one person…yeah it got old quick, but I appreciated the compliment 🙂

I’m not a huge sweets eater, but when I do it’s a POUND CAKE or some type of  fruit dessert. So this cake is the best of BOTH worlds! You’ll love the moist cake, but most of all you’ll love the Lemon syrup as the perfect glaze! If you’d really like to intensify the lemon taste, you may want to double the glaze recipe.

DSCN1466

Ingredients:

Pound Cake:

  • 3 C. all purpose flour
  • ½ tsp baking powder
  • ¼ tsp baking soda
  • ½ tsp salt
  • 2 sticks unsalted butter, room temperature
  • 3 C. sugar
  • 6 large eggs, room temperature
  • 1 tsp vanilla
  • Grated zest of 2 Meyer  lemons
  • 1 C. sour cream, room temperature

Lemon Glaze:

  • 1 C. fresh squeezed Meyer Lemon juice
  • 2/3 C.  sugar
  • ¼ C.  water
  • Zest of 1 Meyers lemon

Directions:

  1. Preheat the oven to 325 degrees and position the rack to the center of the oven.
  2. Butter and flour a 10 inch Bundt pan removing excess flour.
  3. Sift the flour, baking powder, baking soda and salt in a large bowl and set aside.
  4. Beat the butter and sugar in a large bowl on high speed for 3 minutes, until fluffy.
  5. Beat in the eggs one at a time, careful not to over mix the batter.
  6. Add the vanilla and zest to the batter.
  7. Lower the speed on the mixer and add 1 cup of flour until blended
  8. Add ½ cup sour cream until mixed
  9. Continue adding flour and sour cream alternatively ending with the flour beating until smooth.
  10. Spread the batter in the pan.
  11. Bake for 75-80 minutes or until the wooden skewer inserted in the center of the cake comes out clean.
  12. When done, transfer the cake to a wire rack and cool for 10 minutes while it is still in the pan.
  13. Bring the lemon juice, zest, water and sugar to a boil over high heat until the sauce is reduced to ½ cup, 18-20 minutes.
  14. Cool the syrup.
  15. When cooled, drizzle half of the syrup over the top of the cake while it is still in the pan.
  16. Invert the cake onto the rack and brush the remaining syrup over the rest of the cake.

Serving: 12

Adapted from Art Smith

WOW! I can’t pass up the opportunity to share this fantastic looking recipe by On Sugar Mountain. I’ not a huge sweets fan, BUT this is one recipe I will put on my to do list!

On Sugar Mountain

Hello friends!

It’s that time of year again….

….no not Christmas, silly. It’s the end of February. 😉

It’s that time of year when those adorable girls in their badge-covered, green sashes proudly extort millions of dollars from us in the form of Girl Scout Cookies.

Samoa Donuts - On Sugar Mountain

Extortion? Really, Jess, isn’t that a little harsh?

No friends, it is absolutely, without a doubt, the most accurate word to describe the sale of Girl Scout Cookies. You know why? THERE”S NEVER ENOUGH COOKIES IN ONE BOX.  I don’t care if you’d have to cram them in, but I demand more Samoas (ahem, Caramel D-Lites) in my precious purple box of cookies.

Do you know how terribly fat I feel eating an entire box of cookies?! Well, maybe you do, since I always see people buying multiple boxes of the same kind of cookie outside the grocery store.

Girl Scouts: “Would you like…

View original post 679 more words